Author: ssamjh

  • How to Create a Custom Piper TTS Voice

    Piper is a fantastic tool for providing very realistic sounding TTS while also being efficient and fast. There are some publicly available pre-trained models, but if you’re here, that means you want to create your own voice. This guide aims to walk you through the steps.

    Requirements

    • WSL – only for Windows, installed by default
    • An Nvidia GPU – technically possible without one
    • A decent quality microphone
    • A basic understanding of Linux
    • Some basic Python knowledge

    WSL – Windows Only

    Start by opening a Command Prompt as admin (right click in start).

    Update and set to version 2:

    wsl --update
    wsl --set-default-version 2

    Create:

    wsl --install Ubuntu-22.04

    When done, open up the WSL from the start menu. On first launch it will prompt us for a username and password.

    Once you are in the WSL, run these commands to update the Ubuntu repositories and install some required packages

    sudo apt update
    sudo apt dist-upgrade -y
    sudo apt install python3-dev python3.10-venv espeak-ng ffmpeg build-essential -y

    Piper – Recording Studio

    Creating the venv

    Piper Recording Studio allows us to easily record a dataset to train a model of our voice with.

    Install:

    cd ~/
    
    git clone https://github.com/rhasspy/piper-recording-studio.git
    
    python3 -m venv ~/piper-recording-studio/.venv
    
    cd ~/piper-recording-studio/
    source ~/piper-recording-studio/.venv/bin/activate
    
    python3 -m pip install --upgrade pip
    python3 -m pip install -r requirements.txt
    python3 -m pip install -r requirements_export.txt

    Run:

    python3 -m piper_recording_studio
    Recording

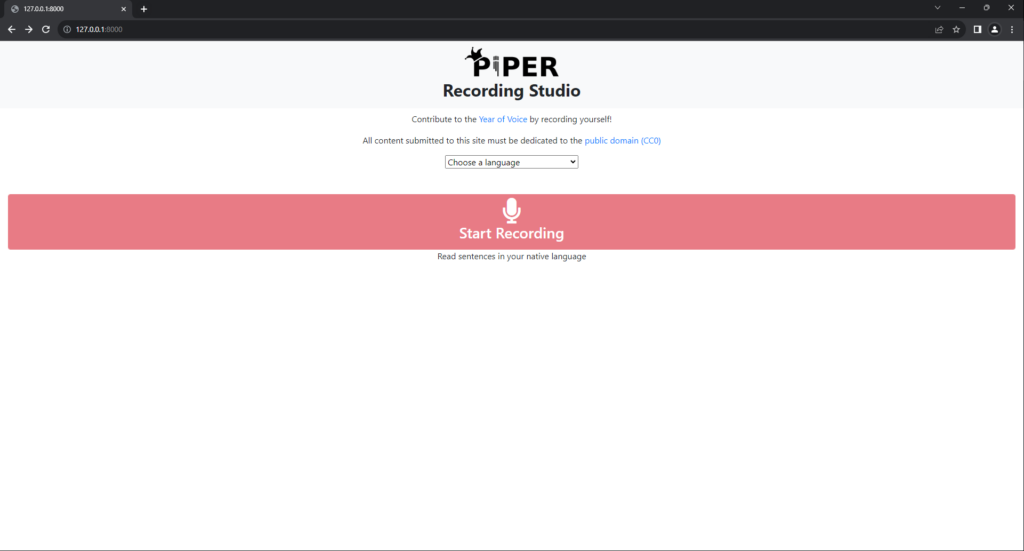
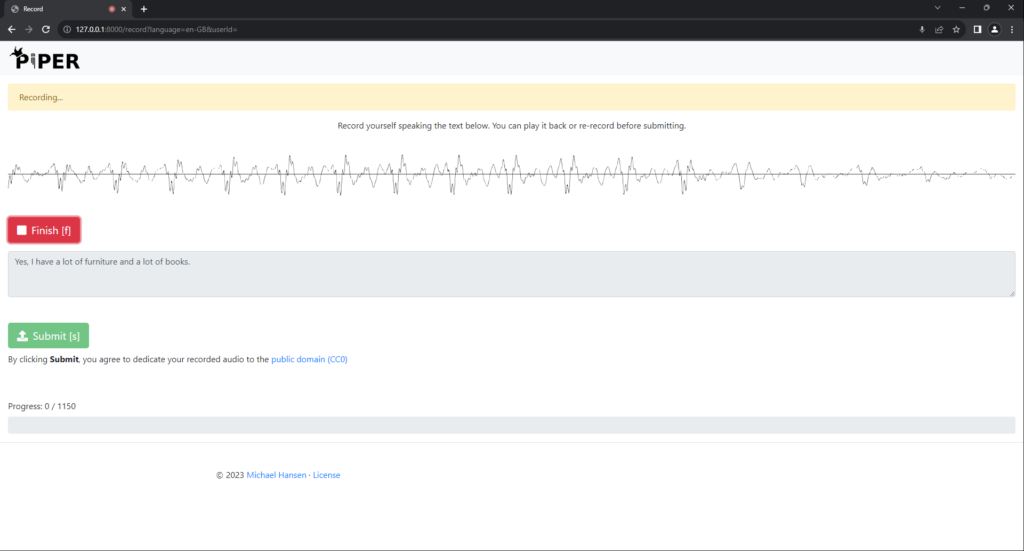
    Go to http://localhost:8000, and follow the steps.

    I used the English (United Kingdom) option. It best matches the New Zealand accent, but pick one that works best for you.

    In my testing, I’ve done at least 100, but for the best results you should train as many as possible.
    Exporting

    Once you’re happy with the recordings, you can quit the program by pressing Ctrl + C.

    Replace <lang> with your recording language. Identify it by checking the output directory or the URL during recording (http://127.0.0.1:8000/record?language=en-GB)

    Exporting:

    python3 -m export_dataset output/<lang>/ ~/piper-recording-studio/my-dataset

    Finishing up:

    deactivate

    Piper TTS

    Creating the venv

    Let’s create a venv for piper itself. The python install commands will take some time.

    Install:

    cd ~/
    
    git clone https://github.com/rhasspy/piper.git
    
    python3 -m venv ~/piper/src/python/.venv
    
    cd ~/piper/src/python/
    source ~/piper/src/python/.venv/bin/activate
    
    python3 -m pip install --upgrade pip
    python3 -m pip install --upgrade wheel setuptools
    python3 -m pip install -e .
    sudo bash ~/piper/src/python/build_monotonic_align.sh

    If you’re having troubles, you may also need to manually install torch metrics version 0.11.4 as follows:

    python3 -m pip install torchmetrics=0.11.4
    Preprocessing your dataset

    This section is a stripped down version of the Piper Training page, it’s highly recommended you read it in full. I am going to build a “medium” quality model, but this will get you going for now.

    Copy the dataset:

    cp -r ~/piper-recording-studio/my-dataset ~/piper/

    Now we begin the python script.

    Don’t forget to also pick the language at this step too, here is a list of the options, this option will be what creates the “accent”. I’m in New Zealand, and I’ve found the “en” preset is the best.

    Preprocess:

    cd ~/piper/src/python/
    
    python3 -m piper_train.preprocess \
      --language en \
      --input-dir ~/piper/my-dataset \
      --output-dir ~/piper/my-training \
      --dataset-format ljspeech \
      --single-speaker \
      --sample-rate 22050
    Training (the long part)

    Now it’s time to train, there is an art to getting the right amount of training, not enough and the voice sounds robotic and too much and the voice may be “over-trained”.

    In the Piper training docs the example command has a max epoch value of 10,000, but I’ve found it can work with a number like 6,000 also.

    To make training much faster, we can train from an existing checkpoint. I’ve had good results with “lessac” medium one, so let’s download that.

    Oh, and even though it says “en_US” I’ve found that does not matter when using other English accents (in the preprocessing stage).

    wget https://huggingface.co/datasets/rhasspy/piper-checkpoints/resolve/main/en/en_US/lessac/medium/epoch%3D2164-step%3D1355540.ckpt -O ~/piper/epoch=2164-step=1355540.ckpt

    And now once all of that is done, time to begin training. For now we will set the max epoch as 6,000 – this can be changed later.

    Note: The epoch value is the total amount of epochs. If your existing checkpoint is 2300, and you set max_epochs to 2400, it will only train 100 epochs. Thanks to Bargobones for this suggestion.

    Make sure to also update the bold parts with the folders you used in previous steps.

    If you have an Nvidia GPU then leave the accelerator line in, otherwise you can train on a CPU only, but this will take days and days or even longer. The batch size can be adjusted to suit your GPU. I have a RTX 3080 and I find 42 works well, but in testing on a GTX 1080 I had to lower it to 12. You’ll know this is an issue if the training complains about running out of memory.

    cd ~/piper/src/python/
    
    python3 -m piper_train \
        --dataset-dir ~/piper/my-training \
        --accelerator 'gpu' \
        --devices 1 \
        --batch-size 32 \
        --validation-split 0.0 \
        --num-test-examples 0 \
        --max_epochs 6000 \
        --resume_from_checkpoint ~/piper/epoch=2164-step=1355540.ckpt \
        --checkpoint-epochs 1 \
        --precision 32
    Testing the model

    If you want to quickly test the model, we can use the python script for it.

    First, copy the file from the existing folder we downloaded earlier, thanks to Bargobones for pointing this out.

    cp ~/piper/etc/test_sentences/test_en-us.jsonl ~/piper/test_en-us.jsonl

    And now run the test code (making sure we are in the venv).

    Check the version_X is the right number (it will be showing in the training logs).

    cat ~/piper/etc/test_sentences/test_en-us.jsonl | \
        python3 -m piper_train.infer \
            --sample-rate 22050 \
            --checkpoint ~/piper/my-training/lightning_logs/version_0/checkpoints/*.ckpt \
            --output-dir ~/piper/my-training/output

    We can then access the files to listen to, by opening Windows Explorer and clicking on the “Linux” section at the bottom right. Once there, click “Home”, then “Ubuntu” and then the username you created at the start. From there you will see the piper folder and inside there is the training folder.

    Resuming training

    Lets say you want to pause training, then it’s easy to resume the training from where you left off. You just need to modify the command slightly.

    We need to change the –resume-from-checkpoint option to specify the latest cpkt file. You can tell which is the latest file by browsing the ~/piper/my-training/ folder, each time you run the training it will create a “version” and you just need to pick the latest one (highest number). In this case, it’s training_0 for me.

    Then inside the training folder, there is a lighting_logs folder, then there is a checkpoint folder, and inside that there will be a cpkt file, this is what we have to provide in the resume argument. You will need to modify this command yourself based off the file structure and version number.

    cd ~/piper/src/python/
    
    python3 -m piper_train \
        --dataset-dir ~/piper/my-training \
        --accelerator 'gpu' \
        --devices 1 \
        --batch-size 32 \
        --validation-split 0.0 \
        --num-test-examples 0 \
        --max_epochs 6000 \
        --resume_from_checkpoint ~/piper/my-training/lightning_logs/version_0/checkpoints/epoch=5589-step=1382940.ckpt \
        --checkpoint-epochs 1 \
        --precision 32
    Exporting

    And that brings me to the last step, exporting. It goes something like this.

    Make sure to replace the cpkt file with the most recent version from your “my-training” directory.

    mkdir ~/piper/my-model
    
    python3 -m piper_train.export_onnx \
        ~/piper/my-training/lightning_logs/version_0/checkpoints/epoch=5589-step=1382940.ckpt \
        ~/piper/my-model/model.onnx
        
    cp ~/piper/my-training/config.json \
       ~/piper/my-model/model.onnx.json

    Bonus links

    PiperUI by natlamir – A easy to use UI that makes generating TTS from a completed Piper model very easy on Windows.

    FAQs

    Q: I’ve quit the Ubuntu WSL and now commands aren’t working?
    A: You need to re-enable the python venv, see the bold commands under the “install” section for both Piper and Piper Recording Studio.

    Q: I get a libcuda error when trying to train?
    A: It’s due to a bug explained here. Try this command to fix it:

    sudo rm -r /usr/lib/wsl/lib/libcuda.so.1 && sudo rm -r /usr/lib/wsl/lib/libcuda.so && sudo ln -s /usr/lib/wsl/lib/libcuda.so.1.1 /usr/lib/wsl/lib/libcuda.so.1 && sudo ln -s /usr/lib/wsl/lib/libcuda.so.1.1 /usr/lib/wsl/lib/libcuda.so && sudo ldconfig

    Q: How can I move the WSL system to another drive?
    A: Installing to a custom drive is not supported, but after creating you can move it, see this page.

    Conclusion

    So this guide was the result of about 2 weeks of me playing around with trial and error.

    A massive shoutout to Thorsten-Voice and this video in particular for getting me started, you’ll even see my helpless comment on that video.

    And some ideas of what you can do next, what about using your own voice in a setup like this, or maybe creating a website which allows people to create TTS using your voice – I’ve done this and nothing bad has happened… yet.
  • Quic vs Voyager: A (bigger) Comprehensive Look

    I’ve recently made the switch to Quic from Voyager. And as part of that, I decided to make another comparison blog post, but this time with a lot more metrics.

    The fine details

    T’s & C’s: Speed Tests

    So this is how I made it fair. On the 26th and 28th of September 2022 I ran 3 series of speed tests. Here’s the raw results if you’re keen – good luck it’s messy.

    To help make it more fair, I’ve chosen the “8AM” results. A few reasons, this is a fairly peak time of the day, plus I’m a night owl, so I wouldn’t be awake at that time, and I’m the only one on this internet connection. This technically means that Voyager’s speed tests were conducted on a public holiday, but that doesn’t seem to skew the results.

    For each server, 2 tests were run back to back. I’ve then selected the best numbers from each.

    T’s & C’s: Ping Tests

    As for the ping tests, I have taken all results from my SmokePing server, as an average over 24 hours from these dates:

    Voyager – 24th September 2022
    Quic – 27th September 2022

    The results

    Speeds

    Okay, here you go. The “best” results are underlined.

    Server/LocationISPLatencyDownloadUpload
    Spark, AucklandVoyager5.67921.36516.73
    Quic7.94747.02479.05
    2degrees, Auckland, New ZealandVoyager6.66784.6508.63
    Quic6.53854.4498.43
    Voyager, Auckland, New ZealandVoyager5.64921.63516.86
    Quic6.6883.49506.51
    Vocus, Sydney, AustraliaVoyager30.8918.51204.39
    Quic29.55595.25187.28
    Vetta, Sydney, AustraliaVoyager28.39835.06153.09
    Quic29.02935.81223.64
    Vocus, Melbourne, AustraliaVoyager42.14918.13181.37
    Quic41.27668.53148.18
    Optus, Melbourne, AustraliaVoyager39.99809.56159.79
    Quic41.85862.84174.75
    Vocus, Perth, AustraliaVoyager74.46864.99161.68
    Quic76.04566.65131.09
    Verizon, Tokyo, JapanVoyager142.63577.0477.86
    Quic257.33382.1346.47
    fdcservers, Tokyo, JapanVoyager288.88685.6272.15
    Quic212.23455.4867.14
    GSL Networks, Tokyo, JapanVoyager166.97757.160.98
    Quic126.92856.2789.16
    Jio, Kolkata, IndiaVoyager174.69483.2884.12
    Quic180.43420.7662.34
    Vi, New Delhi, IndiaVoyager291.78187.4686.19
    Quic294.95216.3759.93
    Powernet, New Delhi, IndiaVoyager299.94378.4252.43
    Quic304.44467.7757.79
    Gayatri, New Delhi, IndiaVoyager188.59889.0745.33
    Quic299.27699.5136.67
    3BB, Bangkok, ThailandVoyager345674.7656.07
    Quic330.05413.7634.76
    TOT, Bangkok, ThailandVoyager145.72776.1266.96
    Quic173.23396.4537.59
    Biznet, Jakarta, IndonesiaVoyager134.59315.7281.09
    Quic133.6465.13106.8
    CBN, Jakarta, IndonesiaVoyager217.72765.06104.66
    Quic397.67602.4348.87
    MyRepublic, SingaporeVoyager118.9824.7374.14
    Quic119.25410.462.34
    Singtel, SingaporeVoyager193.26925.4386.61
    Quic240.83810.0970.54
    M1 Limited, SingaporeVoyager122.13742.0282.57
    Quic204.8209.5847.31
    Vodacom, Cape Town, South AfricaVoyager430.75423.7343.04
    Quic394.42396.622.8
    MTN, Cape Town, South AfricaVoyager421.28263.3917.32
    Quic437.64602.3738.45
    Comcast, San Francisco, CA, United StatesVoyager131.42504.52103.7
    Quic187.96606.9735.73
    Unwired, San Francisco, CA, United StatesVoyager137.13435.6293.76
    Quic137.55750.4761.01
    Spectrum, Los Angeles, CA, United SatesVoyager147.42666.8171.06
    Quic175.22530.6659.77
    Frontier, Los Angeles, CA, United SatesVoyager133.7882.46104.19
    Quic181.26844.6658.29
    AT&T, Houston, TX, United SatesVoyager182.04529.39117.38
    Quic212.91667.6779.59
    Comcast, Houston, TX, United SatesVoyager170.3449.9890.55
    Quic239.78456.2238.23
    CenturyLink, Houston, TX, United SatesVoyager211.57326.7959.81
    Quic216.18630.2550.08
    Windstream, New York, NY, United SatesVoyager282.57430.4271.13
    Quic196.53274.0555.07
    Spectrum, New York, NY, United SatesVoyager196.36489.1860.22
    Quic190.44353.3685.18
    Contabo, New York, NY, United SatesVoyager197.5183.279.65
    Quic242.71517.9539.1
    TELUS, Vancouver, BC, CanadaVoyager149.76707.0282.24
    Quic188.56454.3642.56
    Bell, Vancouver, BC, CanadaVoyager145.03706.8792.5
    Quic164.35453.9666.56
    Frontier, Vancouver, BC, CanadaVoyager148.89819.3966.11
    Quic150.37612.9940.11
    Bell, Toronto, ON, CanadaVoyager193.19690.2362.85
    Quic212.84565.1131.36
    TELUS, Toronto, ON, CanadaVoyager199.85702.0564.77
    Quic239.53443.5648.38
    fdcservers, Santiago, ChileVoyager290.24498.4936.42
    Quic347.56643.439.98
    EdgeUno, Santiago, ChileVoyager271.7457.4440.7
    Quic358.53526.7415.5
    Vodafone, London, United KingdomVoyager271.79796.0178.8
    Quic308.21830.1774.84
    Coreix, London, United KingdomVoyager263.93898.4538.72
    Quic255.09573.527.24
    Vodafone, Manchester, United KingdomVoyager275.86130.8769.95
    Quic313.44168.9348.19
    M247 Ltd, Manchester, United KingdomVoyager263.03432.167.83
    Quic268.15588.7632.88
    Orange, Paris, FranceVoyager265.5479.9327.7
    Quic296.91601.8535.38
    SFR, Paris, FranceVoyager278.8743.4137.84
    Quic266.42646.634.56
    Tiscali, Rome, ItalyVoyager290.8438.6740.97
    Quic282.74653.3441.33
    TIM, Rome, ItalyVoyager299.4879154.62
    Quic305.13624.4382.13
    Deutsche Telekom, Berlin, GermanyVoyager289.51478.9871.62
    Quic284.6670.7629.3
    Inter.link, Berlin, GermanyVoyager285.38484.7434.25
    Quic311.95587.7130.14
    Ookla, Oslo, NorwayVoyager287.8453.3556.64
    Quic285.84558.1227.84
    Telia Norge, Oslo, NorwayVoyager292.51382.5258.91
    Quic314.47429.7531.06
    Turkcell, Istanbul, TurkeyVoyager307.52394.0736.39
    Quic313.09617.6130.69
    Turk Telekom, Istanbul, TurkeyVoyager309.92395.1257.76
    Quic314.66433.9963.93
    TurkNet, Istanbul, TurkeyVoyager323.08720.7776.66
    Quic313.75613.9542.36

    Now these results are interesting, overall Quic seems to be slower on average, but shines to a few locations, my guess would be completely different routing, but don’t quote me on that… I’m not a network engineer. Do not fret, though, the latency numbers get interesting.

    Latency

    Amazon AWS

    AmericaVoyagerQuic
    Canada (Central – Montreal) – ca-central-1208.6199.3
    Brazil (São Paulo) – sa-east-1309347.5
    USA (East1 – N. Virginia) – us-east-1207.5198.3
    USA (East2 – Ohio) – us-east-2209.5200.2
    USA (West1 – N. California) – us-west-1137.5144.2
    USA (West2 – Oregon) – us-west-2156146.8
    Europe
    Germany (Frankfurt) – eu-central-1281.1269.1
    Sweden (Stockholm) – eu-north-1311.8287.8
    Italy (Milan) – eu-south-1292.2278.5
    Ireland (Dublin) – eu-west-1284.8265.4
    United Kingdom (London) – eu-west-2273.6256.4
    France (Paris) – eu-west-3273.7263.7
    Asia / Pacific
    Hong Kong – ap-east-1159160.7
    Japan (Tokyo) – ap-northeast-1192.5187.8
    South Korea (Seoul) – ap-northeast-2197.5193.6
    Japan (Osaka) – ap-northeast-3193.1189.4
    China (Beijing) – cn-north-1197241.3
    China (Ningxia) – cn-northwest-1220.1256.2
    India (Mumbai) – ap-south-1183.4180.6
    Singapore – ap-southeast-1124.6120.7
    Australia (Sydney) – ap-southeast-232.834
    Indonesia (Jakarta) – ap-southeast-3139.6135.3
    Africa / Middle East
    South Africa (Cape Town) – af-south-1337.3406.5
    Bahrain – me-south-1275.9339.8

    Digital Ocean

    North AmericaVoyagerQuic
    USA (New York City 1) – nyc1196.9228.3
    USA (New York City 2) – nyc2194.1228.5
    USA (New York City 3) – nyc3197203.5
    USA (San Fransisco 1) – sfo1159.8137.2
    USA (San Fransisco 2) – sfo2163137
    USA (San Fransisco 3) – sfo3163.5137
    Canada (Toronto) – tor1196190.4
    Europe
    Netherlands (Amsterdam 2) – ams2286.6264.8
    Netherlands (Amsterdam 3) – ams3288.3274.3
    Germany (Frankfurt) – fra1286269
    United Kingdom (London) – lon1227.9256.1
    Asia / Pacific
    India (Bangalore) – blr1260.2290.4
    Singapore – sgp1118.9120.3

    Oracle Cloud

    AmericaVoyagerQuic
    USA (East – Ashburn) – us-ashburn-1199.1240.2
    USA (West – Phoenix) – us-phoenix-1144.1147.4
    USA (West – San Jose) – us-sanjose-1166.2136.1
    Brazil (East – São Paulo) – sa-saopaulo-1329.9351.1
    Brazil (Southeast – Vinhedo) – sa-vinhedo-1308.5310.3
    Chile (Santiago) – sa-santiago-1304.6322.9
    Europe
    France (South – Marseille) – eu-marseille-1279.3281.8
    Germany (Central – Frankfurt) – eu-frankfurt-1284.4266
    Italy (Northwest – Milan) – eu-milan-1280.1292.1
    Amsterdam (Northwest – Netherlands) – eu-amsterdam-1227.1274
    Stockholm (Central – Sweden) – eu-stockholm-1292.3292.3
    Zurich (North – Switzerland) – eu-zurich-1292.1291.7
    United Kingdom (South – London) – uk-london-1266.4256
    United Kingdom (West – Newport) – uk-cardiff-1276.2328.2
    Asia / Pacific
    Australia (East – Sydney) – ap-sydney-130.435.9
    Australia (Southeast – Melbourne) – ap-melbourne-141.346.3
    India (South – Hyderabad) – ap-hyderabad-1164.7281.9
    India (West – Mumbai) – ap-mumbai-1170.8282.1
    Japan (Central – Osaka) – ap-osaka-1172.2186.1
    Japan (East – Tokoyo) – ap-tokyo-1171.4187
    Singapore – ap-singapore-1122120.1
    South Koera (Central – Seoul) – ap-seoul-1192273.1
    South Koera (North – Chuncheon) – ap-chuncheon-1191.9236.9
    Africa / Middle East
    South Africa (Central – Johannesburg) – af-johannesburg-1431.6338.2
    Saudi Arabia (West – Jeddah) – me-jeddah-1330.1319.3
    United Arab Emirates (Central – Abu Dhabi) – me-abudhabi-1208207.2
    United Arab Emirates (East – Dubaiu) – me-dubai-1198.5198

    OVH Cloud

    North AmericaVoyagerQuic
    Canada (Quebec) – ca-ovh-beauharnois201207.3
    USA (East – Hillsboro) – us-ovh-hillsboro146164.6
    USA (West – Vint Hill) – us-ovh-vinthill199.9193.7
    Europe
    Germany (Limburg) – de-ovh-limburg293.2279.1
    France (Gravlines) – fr-ovh-gravelines282.5270.8
    France (Roubaix) – fr-ovh-roubaix277.7277
    France (Strasbourg) – fr-ovh-strasbourg302.2275.8
    United Kingdom (London) – gb-ovh-erith277270.1
    Poland (Warsaw) – pl-ovh-warsaw302.5299.5
    Asia / Pacific
    Australia (Sydney) – au-ovh-sydney29.230
    Singapore – sg-ovh-singapore122120.1

    In conclusion

    Quic seems to be a good choice. I really love the ability to diagnose my ONT directly from their website.

    If you do end up deciding to go with Quic and would like to give me some love, use my referral code, I earn $50 which helps a broke nerd like myself:

    https://account.quic.nz/refer/893192

    Also, all of this data was entered manually by hand (it took hours), so there’s probably a mistake or two, but all the data is public, so you can confirm yourself with the raw data combined with my SmokePing instance.

  • 2degrees vs Voyager: A Comprehensive Look

    In New Zealand, we’re spoilt with choice when it comes to the internet, often, so much so, that people can struggle to pick an ISP. 2degrees and Voyager are some of the nerds’ favourite providers, so let’s put them head to head.

    All these tests were performed on exactly the same hardware, the only change being the ISP.

    Speed

    Let’s dive into the spreadsheet here, all results are an average of two tests performed back-to-back. The “best” results are underlined.

    2degrees: Friday-10pm (5th March 2021)
    Voyager: Friday-10pm (26th February 2021)

    Now, these times may be biased, so I have many more results recorded throughout the week and may post another table from another time, one time I had in mind was 4 am.

    Server/LocationISPLatencyDownloadUpload
    Spark, Auckland, NZVoyager8.24ms927.95Mb/s446.82Mb/s
    2degrees6.56ms895.00Mb/s471.21Mb/s
    2degrees, Auckland, NZVoyager8.18ms915.22Mb/s455.22Mb/s
    2degrees7.72ms906.34Mb/s463.36Mb/s
    Voyager, Auckland, NZVoyager8.35ms930.62Mb/s462.33Mb/s
    2degrees7.03ms904.80Mb/s456.01Mb/s
    2degrees, Sydney, AUVoyager32.27ms917.86Mb/s405.57Mb/s
    No surprises here2degrees29.54ms922.26Mb/s452.94Mb/s
    OVH Cloud, Sydney, AUVoyager32.19ms38.26Mb/s255.63Mb/s
    Faulty server?2degrees29.89ms21.56Mb/s372.17Mb/s
    MyRepublic, SingaporeVoyager131.87ms394.92Mb/s94.31Mb/s
    2d routes via US2degrees248.39ms781.77Mb/s47.01Mb/s
    OVH Cloud, SingaporeVoyager124.84ms876.10Mb/s130.26Mb/s
    2d routes via US2degrees214.72ms846.09Mb/s99.38Mb/s
    Windstream, LAX, USAVoyager135.95ms715.63Mb/s117.71Mb/s
    2degrees137.78ms913.46Mb/s86.69Mb/s
    Spectrum, LAX, USAVoyager145.73ms447.01Mb/s158.12Mb/s
    2degrees133.78ms909.04Mb/s150.60Mb/s
    2degrees, LAX, USAVoyager132.93ms869.90Mb/s85.82Mb/s
    Upload results are so close!2degrees130.41ms923.27Mb/s84.27Mb/s
    3UK, London, UKVoyager267.30ms459.84Mb/s125.15Mb/s
    2degrees259.58ms906.84Mb/s81.34Mb/s
    ORANGE, Rennes, FranceVoyager293.72ms616.01Mb/s95.53Mb/s
    2degrees291.54ms878.31Mb/s84.28Mb/s

    Latency

    This is a tricky one, as we see from the results above Voyager really shines in the Southeast Asia region. This is because 2degrees routes traffic via the states.

    I run a Smokeping server, so we can use this to get an idea of the latency from 2degrees and Voyager.

    Server/LocationVoyager2degrees
    North America
    US East (N. Virginia)200.7ms195.0ms
    US East (Ohio)205.7ms199.5ms
    US West (N. California)140.7ms140.0ms
    US West (Oregon)160.0ms154.3ms
    Canada (Central)205.7ms202.7ms
    Europe
    Germany (Frankfurt)297.7ms280.7ms
    Sweeden (Stockholm)321.4ms286.2ms
    Italy (Milan)321.6ms287.2ms
    Ireland (Dublin)300.8ms281.5ms
    United Kingdom (London)290.4ms271.6ms
    France (Paris)295.9ms270.6ms
    Asia-Pacific
    Hong Kong151.9ms221.5ms
    Japan (Tokyo)200.2ms246.5ms
    Japan (Osaka)201.2ms252.1ms
    South Korea (Seoul)212.0ms267.8ms
    India (Mumbai)193.4ms447.1ms
    Singapore134.4ms327.4ms
    Australia (Sydney)34.3ms30.4ms
    South America
    Brazil (São Paulo)319.8ms420.2ms
    China
    China (Beijing)187.9ms443.5ms
    China (Ningxia)211.2ms339.8ms
    Middle East
    Bahrain316.4ms452.7ms
    Africa
    South Africa (Cape Town)337.1ms412.7ms

    Summary

    It’s a tough pick between the two, but here are some key details:

    • Voyager wins the fastest “national” bandwidth.
    • 2degrees wins the fastest “international” bandwidth.
    • 2degrees wins the latency tests for North America and Europe.
    • Voyager smokes 2degrees with latency to Asia-Pacific, South America, China, Middle East and Africa.
  • How to add SSL to icecast-kh using Cloudflare

    Intro

    WARNING: Please note that by doing this you are violating Cloudflare’s Terms of Use.

    This guide will take you through setting up Nginx as a reverse proxy for icecast-kh for SSL with full IP forwarding support. This means you can see listeners IPs in the icecast-kh admin panel.

    In this example, we are using Cloudflare to obtain a free SSL certificate. If your domain is not managed by Cloudflare I highly recommend switching, you can find out how to do this easily online, and it’s free! If you are unable to use Cloudflare, then this guide can be modified to work with LetsEncrypt without much effort, but those details are not going to be covered here.

    Requirements

    1. icecast-kh running on an Ubuntu Server (20.04 at the time of this tutorial), a full guide can be found here.
    2. Nginx installed from a PPA.
    3. A server with a public IP address (or port forwarded), there are many guides of this online.
    4. A domain name with DNS controlled via Cloudflare.

    Cloudflare setup

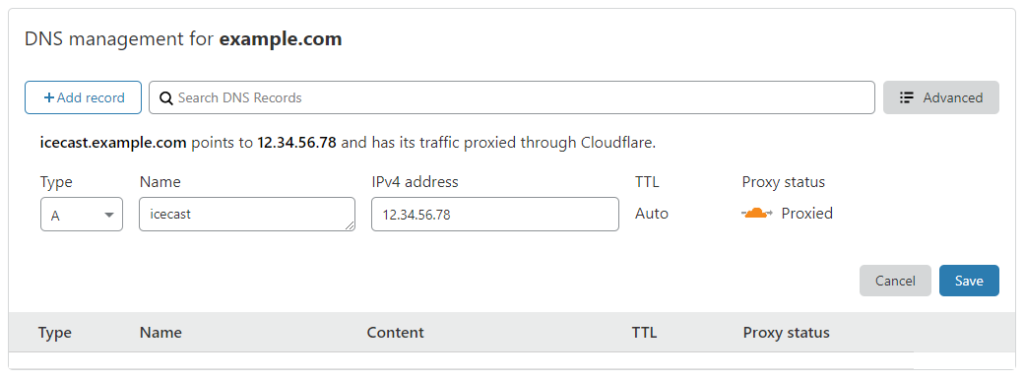
    We need to set up a subdomain in Cloudflare to begin. So start by logging into your account and heading to the DNS page. Once we’re there we need to add a subdomain, let’s use icecast.example.com in this guide.

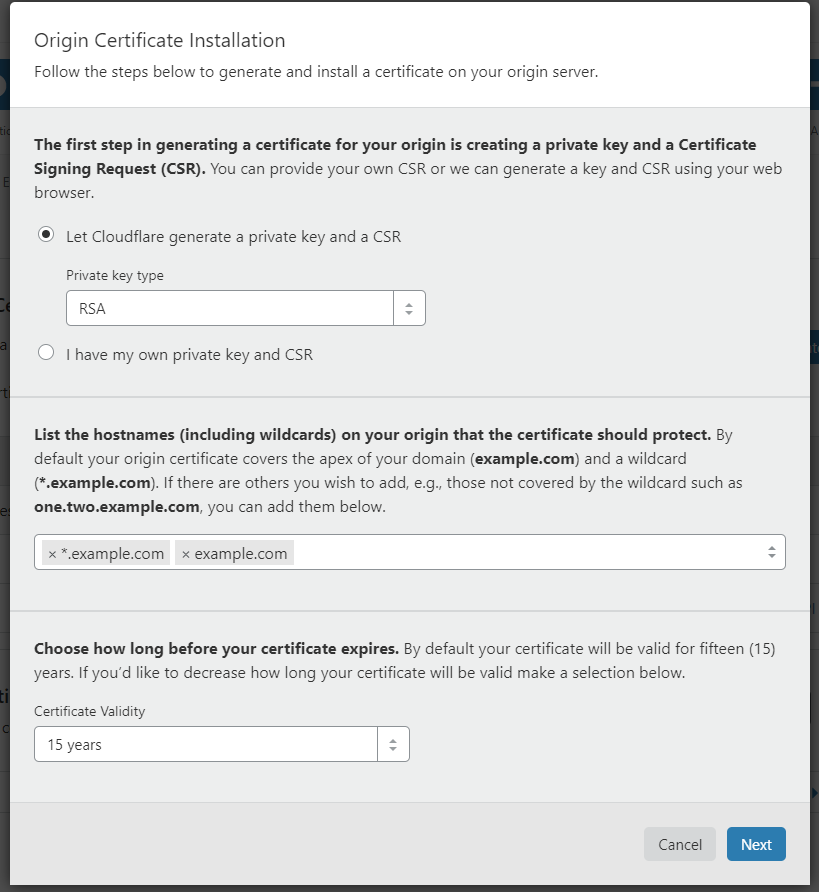
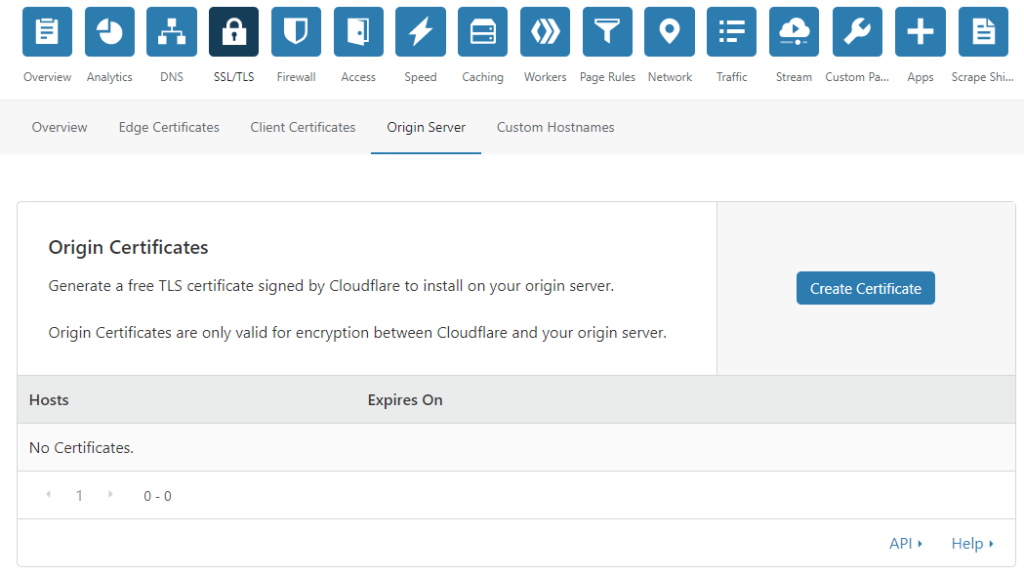
    Now navigate to the SSL/TLS page, and then to origin server. And then click “Create Certificate”.

    Leave all the values as default and click next.

    At the next screen, you will have two big lots of text, keep this tab open for the next step, if you accidently lose these details, you can go back to the beginning of the Cloudflare part, “delete” the current set of keys, and start again.

    Installation

    Make sure our server is up to date.

    apt-get update
    apt-get dist-upgrade -y

    And some requirements.

    apt-get install software-properties-common wget cron nano -y

    Now let’s install Nginx via the official PPA.

    add-apt-repository ppa:nginx/stable -y
    apt-get update
    apt-get install nginx nginx-extras -y

    Setup our SSL certs, change the bold parts below to your own domain.

    mkdir -p /etc/nginx/ssl
    touch /etc/nginx/ssl/example.com.pem
    touch /etc/nginx/ssl/example.com.key

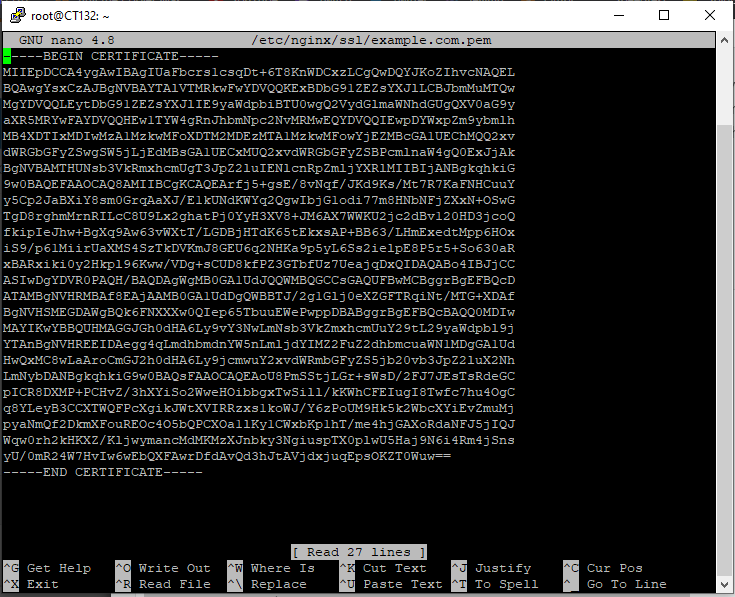
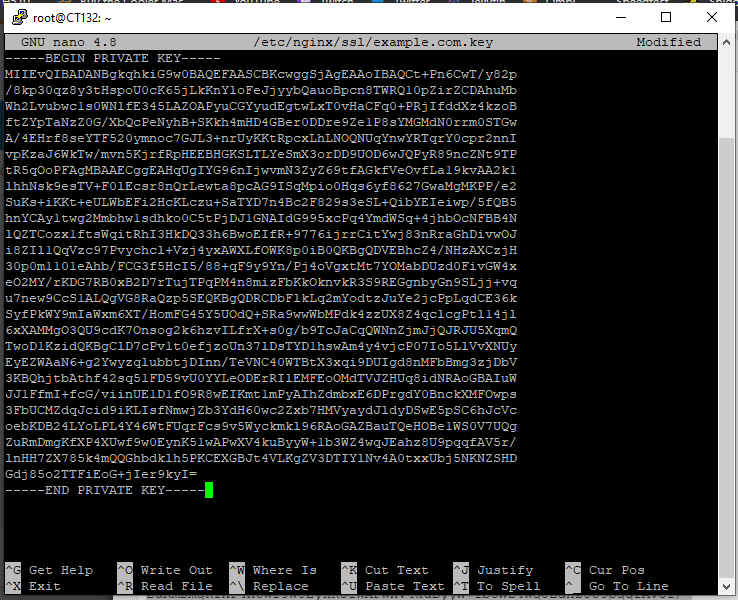
    Now we need to copy our keys in from earlier, I’m going to use Nano, see below.

    nano /etc/nginx/ssl/example.com.pem
    nano /etc/nginx/ssl/example.com.key

    Now we need to add Cloudflare’s IP ranges into Nginx, let’s use this great script created by robsonsobral. I’ve made some slight changes so this works better with our setup.

    wget "https://gist.githubusercontent.com/ssamjh/55bf1d1253f89e300abbed3377042b53/raw/ace6f104d5d47b8e647fb38ca090ede68b645344/cloudflare-update-ip-ranges.sh" -O /opt/cloudflare-update-ip-ranges.sh

    Now let’s open our crontab settings, if promoted select your favourite editor, I recommend nano.

    crontab -e

    Scroll down to the very bottom and add this line.

    0 0 * * * bash /opt/cloudflare-update-ip-ranges.sh >/dev/null 2>&1

    Now exit and save (ctrl + x) your crontab file and run the script then enable the config.

    bash /opt/cloudflare-update-ip-ranges.sh
    ln -s /etc/nginx/sites-available/cloudflare-ips.conf /etc/nginx/sites-enabled/

    Get the icecast-kh Nginx script and put it into your config folder. Code can be viewed here. This config will also stop people accessing the admin panel as an extra layer of security.

    wget "https://gist.githubusercontent.com/ssamjh/accd512f3f61152bcced871fb7b19646/raw/c15defd0c686383ab66f46af7d6193c3ed661ab6/icecastkh-proxy.conf" -O /etc/nginx/sites-available/icecastkh-proxy.conf
    ln -s /etc/nginx/sites-available/icecastkh-proxy.conf /etc/nginx/sites-enabled/

    And edit this file for our own domain using nano, update the bold part with your own domain.

    nano /etc/nginx/sites-available/icecastkh-proxy.conf
    server {
    
      listen 80;
      listen [::]:80;
    
      listen 443 ssl http2;
      listen [::]:443 ssl http2;
    
      ssl_certificate /etc/nginx/ssl/example.com.pem;
      ssl_certificate_key /etc/nginx/ssl/example.com.key;
    
      server_name icecast.example.com;
    
      location / {
    
        proxy_pass http://127.0.0.1:8000/;
        proxy_redirect off;
        proxy_set_header Host $host;
        proxy_set_header X-Forwarded-Proto $scheme;
        proxy_set_header X-Real-IP $remote_addr;
        proxy_set_header X-Forwarded-For $proxy_add_x_forwarded_for;
    
        subs_filter_types application/xspf+xml audio/x-mpegurl audio/x-vclt text/css text/xml;
        subs_filter ':8000/' '/' gi;
        subs_filter '@localhost' '@example.com' gi;
        subs_filter 'localhost' $host gi;
        subs_filter 'Mount Point ' $host gi;
      }
      location /admin/ {
      
        deny all;
      }
    
      location /server_version.xsl {
      
        deny all;
      }
    }

    Next we need to add a line to our icecast-kh config, assuming you followed my tutorial to set it up, the command would be:

    nano /etc/icecast-kh/icecast.xml

    And we need to add the line as the last entry above paths, marked in bold.

    <icecast>
        <limits>
            <sources>2</sources>
        </limits>
        <authentication>
            <source-password>hackme1</source-password>
            <relay-password>hackme2</relay-password>
            <admin-user>admin</admin-user>
            <admin-password>hackme3</admin-password>
        </authentication>
        <directory>
            <yp-url-timeout>15</yp-url-timeout>
            <yp-url>http://dir.xiph.org/cgi-bin/yp-cgi</yp-url>
        </directory>
        <hostname>localhost</hostname>
        <listen-socket>
            <port>8000</port>
        </listen-socket>
        <fileserve>1</fileserve>
        <paths>
            <logdir>/usr/local/var/log/icecast</logdir>
            <webroot>/usr/local/share/icecast/web</webroot>
            <adminroot>/usr/local/share/icecast/admin</adminroot>
            <alias source="/" dest="/index.html"/>
            <x-forwarded-for>127.0.0.1</x-forwarded-for>
        </paths>
        <logging>
            <accesslog>access.log</accesslog>
            <errorlog>error.log</errorlog>
          	<loglevel>3</loglevel> <!-- 4 Debug, 3 Info, 2 Warn, 1 Error -->
        </logging>
    </icecast>

    After all of this is done, we need to restart icecast-kh.

    systemctl restart icecast-kh

    And lastly restart and enable Nginx.

    systemctl enable nginx
    systemctl start nginx

    Final Notes

    And we’re finally done, now go to icecast.example.com and you are ready to view the beauty.

  • How to install icecast-kh on Ubuntu Server

    Intro

    icecast2 is a great piece of software, but these days it seems somewhat largely unmaintained.

    Well, great news – icecast-kh is here! It’s an updated fork of icecast2 with great new features.

    In this guide you will learn how to install your own copy an Ubuntu server!

    Video

    Requirements

    1. An Ubuntu Server (this guide written using 20.04) and access to the root account
    2. About 5 minutes of your time

    Installation

    Update our servers repository.

    apt-get update
    apt-get dist-upgrade -y

    Install some icecast-kh requirements.

    apt-get install build-essential libxslt-dev libvorbis-dev libxml2 libssl-dev curl -y

    Get the latest version of icecast-kh. At the time of writing this is 2.4.0-kh20.1. Download page here.

    wget https://github.com/karlheyes/icecast-kh/archive/icecast-2.4.0-kh20.1.tar.gz
    tar -xvf icecast-*.tar.gz
    cd icecast-kh-icecast-2.4.0-kh20.1

    Compile and install. If you run into any issues here, make sure you have all the dependencies installed (listed here).

    ./configure --with-openssl
    make
    make install

    Move the default config to the /etc directory. Opitionally we may use the more advanced icecast.xml.dist file but for simplicity we are using the minimal.

    mkdir -p /etc/icecast-kh
    cp /usr/local/share/icecast/doc/icecast_minimal.xml.dist /etc/icecast-kh/icecast.xml

    We need to make some changes to our config file, so open it with your favourite text editor – I’m using nano.

    nano /etc/icecast-kh/icecast.xml

    The config file will look something like this. Update the highlighted lines with your own details. Make sure to set the logdir path to the text shown.

    <icecast>
        <limits>
            <sources>2</sources>
        </limits>
        <authentication>
            <source-password>hackme1</source-password>
            <relay-password>hackme2</relay-password>
            <admin-user>admin</admin-user>
            <admin-password>hackme3</admin-password>
        </authentication>
        <directory>
            <yp-url-timeout>15</yp-url-timeout>
            <yp-url>http://dir.xiph.org/cgi-bin/yp-cgi</yp-url>
        </directory>
        <hostname>localhost</hostname>
        <listen-socket>
            <port>8000</port>
        </listen-socket>
        <fileserve>1</fileserve>
        <paths>
            <logdir>/var/log/icecast-kh</logdir>
            <webroot>/usr/local/share/icecast/web</webroot>
            <adminroot>/usr/local/share/icecast/admin</adminroot>
            <alias source="/" dest="/index.html"/>
        </paths>
        <logging>
            <accesslog>access.log</accesslog>
            <errorlog>error.log</errorlog>
          	<loglevel>3</loglevel> <!-- 4 Debug, 3 Info, 2 Warn, 1 Error -->
        </logging>
    </icecast>

    Add a user for icecast-kh. Leave all the fields blank.

    adduser icecast --disabled-login

    Create a log directory and change permissions.

    mkdir -p /var/log/icecast-kh
    chown -R icecast:icecast /var/log/icecast-kh/

    Install the init.d script. View the code here.

    wget https://gist.githubusercontent.com/ssamjh/500aa158cb77a8eff79c8d1763eef339/raw/fb0a4a2d39a87affb46fc598e07da668670188fd/icecast-kh -O /etc/init.d/icecast-kh
    chmod 777 /etc/init.d/icecast-kh
    update-rc.d icecast-kh defaults

    And finally start the server.

    systemctl start icecast-kh
    systemctl enable icecast-kh

    Final Notes

    And that’s it! Your new icecast-kh server is up and running on port 8000.

  • How to install MongoDB on Ubuntu 16.04

    Hey all

    I haven’t found any rock solid guides for doing so, so I thought I’d make my own. Follow these steps and I will explain as best as I can.


    To start off let’s install some dependencies to make sure everything will work (sort of mundane but just do it for the memes).

    sudo apt-get install sudo nano -y


    Now, we need to add MongoDB to our apt.

    sudo apt-key adv --keyserver hkp://keyserver.ubuntu.com:80 --recv 0C49F3730359A14518585931BC711F9BA15703C6
    
    echo "deb [ arch=amd64,arm64 ] http://repo.mongodb.org/apt/ubuntu xenial/mongodb-org/3.4 multiverse" | sudo tee /etc/apt/sources.list.d/mongodb-org-3.4.list


    Next, we update and install it.

    sudo apt-get update 
    sudo apt-get install mongodb-org -y


    To make sure Mongo can work properly we need a systemd service setup.

    sudo nano /etc/systemd/system/mongodb.service


    And in that file paste the following

    [Unit]
    Description=High-performance, schema-free document-oriented database
    After=network.target
    
    [Service]
    User=mongodb
    ExecStart=/usr/bin/mongod --quiet --config /etc/mongod.conf
    
    [Install]
    WantedBy=multi-user.target


    Okay, now we need to start MongoDB like so.

    sudo systemctl start mongod
    
    sudo systemctl enable mongod

    and you should see something like this

    Created symlink from /etc/systemd/system/multi-user.target.wants/mongod.service
    to /lib/systemd/system/mongod.service.


    Now we need to add an admin user and set the password, replace admin123 with your own password.

    mongo
    
    use admin
    
    db.createUser({user:"admin", pwd:"admin123", roles:[{role:"root", db:"admin"}]})


    This step is optional, but if you want to enable security and allow database access from remote locations do this.

    nano /etc/mongod.conf


    And edit the following lines (see bold parts):

    net:
    port: 27017
    bindIp: 0.0.0.0


    #security:
       authorization: "enabled"


    And that’s it! Now restart Mongo for good measures and you’re done!

    sudo systemctl restart mongod
  • SinusBot Bootscript Installation Guide

    This tutorial will explain how to install the SinusBot automatic starting script on Debian and  Ubuntu 15.04 and lower servers.

    Lets get straight into it!


    First, we need to install the dependencies.

    apt-get update && apt-get install curl screen -y


    Next, we need to download the script and change its permissions. The script I have used can be found here. Full credit to its author.

    curl https://ssamjh.nz/scripts/sinusbot -o /etc/init.d/sinusbot
    chmod 777 /etc/init.d/sinusbot


    If you followed my installation tutorial you can skip this step. Otherwise, if you didn’t you can use this command and edit the script to your linking.

    nano /etc/init.d/sinusbot


    Now that is done we just need to tell the server to use the file with the following command.

    update-rc.d sinusbot defaults


    UPDATE: The following commands may not display any text when typed on Ubuntu 16.04 or higher. I am aware of this issue and am going to release a short video explaining a workaround soon.

    Now just do

    service sinusbot

    and it will list all the options you have! For example

    service sinusbot start

    and

    service sinusbot stop


    That will be all <3

  • SinusBot youtube-dl Installation Guide

    This is just a short guide on how to install youtube-dl and set it up to work with SinusBot.

    You may also want to read my SinusBot Installation Guide or my SinusBot Bootscript Installation Guide.
    But anyway enough blah blah lets get into it!


    First install curl so we can download youtube-dl

    apt-get update && apt-get install curl python -y


    Next we need to download youtube-dl and change it’s permissions. You can install it anywhere you want, but if you use the commands below you can run youtube-dl from anywhere on your server and it will work.

    curl -L https://yt-dl.org/downloads/latest/youtube-dl -o /usr/local/bin/youtube-dl
    chmod a+rx /usr/local/bin/youtube-dl

    Done, you just installed youtube-dl! If you need to upgrade it, just re-run the commands above. And if SinusBot stops playing videos, youtube-dl probably needs upgrading 😛


    Now time to tell SinusBot where the file is. So change to the directory that you installed it in, if you followed my installation guide it will be in /home/sinusbot.

    cd /home/sinusbot


    Next, open the config.ini file in your favorite editor, I use nano.

    nano config.ini


    And change the line

    YoutubeDLPath = ""

    to (this is where we installed it to if you installed youtube-dl to a different directory just change it below)

    YoutubeDLPath = "/usr/local/bin/youtube-dl"

    and then exit and save the file (press Ctrl+x, then enter and then y).


    And then restart SinusBot, if you followed my Bootscript guide, just type

    service sinusbot restart


    If you run into issues with youtube-dl not working at all, you might find that YouTube has blocked your IP. I have noticed this happens on mainly OVH servers or people who re-sell OVH etc. You can solve this issue by running this single command below.

    echo '--force-ipv4' > /etc/youtube-dl.conf


    And that is it! Good luck with your SinusBotting 😉

  • SinusBot Installation Guide

    Hello there, this is my guide on how to install SinusBot on a Debian based operating system.

    You may also want to check out my youtube-dl guide or my bootscript guide (which automatically starts sinusbot for you).

    You will need to start by installing some dependencies. So let’s run the commands to install those now.

    apt-get update
    apt-get install nano x11vnc xvfb xinit libxcursor1 ca-certificates bzip2 curl -y
    update-ca-certificates

    If you run into some issues on your server, try the following command as it can sometimes help.

    apt-get install libglib2.0-0


    We are now going to add a user for the bot. It can be anything but for this tutorial, I am going to use the username “sinusbot”.

    adduser sinusbot

    After you have typed this command it will then prompt you for a password, set it as whatever you’d like, but make sure you remember what it is! It will then prompt for some information, fill it out as you like and the finally create the user.


    Next, we are going to extract the bot to a location on the server. I am going to install it in /opt but you can choose where you’d like to install it if you want.

    su - sinusbot
    curl https://www.sinusbot.com/dl/sinusbot-beta.tar.bz2 -o sinusbot.tar.bz2
    tar -xjf sinusbot.tar.bz2


    Now that is done we need to set the default config SinusBot will use

    cp config.ini.dist config.ini


    The next step is to install the TeamSpeak3 client for SinusBot. If you want a custom TeamSpeak3 version just change 3.0.19.4 in both places to the version you want!

    curl http://dl.4players.de/ts/releases/3.0.19.4/TeamSpeak3-Client-linux_amd64-3.0.19.4.run -o teamspeak.run
    chmod 777 teamspeak.run
    ./teamspeak.run


    After TeamSpeak is installed we need to tell SinusBot where it is. So we need to edit the config.ini file in the Sinusbot directory like so.

    nano config.ini


    And then find this line:

    TS3Path = "/opt/ts3soundboard/TeamSpeak3-Client-linux_amd64/ts3client_linux_amd64"

    and if you have used the directory like I used in this tutorial change it to

    TS3Path = "/home/sinusbot/TeamSpeak3-Client-linux_amd64/ts3client_linux_amd64"


    Now we have to copy the SinusBot TeamSpeak plugin to the TeamSpeak clients directory. The bot WILL NOT WORK PROPERLY if you don’t do this command.

    cp plugin/libsoundbot_plugin.so /home/sinusbot/TeamSpeak3-Client-linux_amd64/plugins


    After that just chmod the sinusbot executable to 755 like so.

    chmod 755 sinusbot


    If you want to be tidy you can remove the files you used to install it with the following commands.

    rm /home/sinusbot/sinusbot.tar.bz2
    rm /home/sinusbot/teamspeak.run


    And you are done! If you want you can just run it in a screen or tmux. Other than that you can check out my other tutorial that explains how to make it part of the init.d scripts in Ubuntu 14.04 or older.

  • TeamSpeak3 Server Ubuntu/Debian Installation Guide

    Hi, all! I like all things TeamSpeak. So I thought I could write an article on how you would install it on your Ubuntu or Debian server. A thing to keep in mind is I will try to keep the download link updated as much as I can but if I forget you will just need to grab the latest server download from the TeamSpeak downloads page.

    Anyway, enough chit-chat! Let’s get into it! 😀


    Run this command to install the depends.

    apt-get install curl bzip2 -y


    If your server is 32-bit you will need to run this command:

    curl http://dl.4players.de/ts/releases/3.0.13.6/teamspeak3-server_linux_x86-3.0.13.6.tar.bz2 -o teamspeak.tar.bz2

    If your server is 64-bit you will need to run this command:

    curl http://dl.4players.de/ts/releases/3.0.13.6/teamspeak3-server_linux_amd64-3.0.13.6.tar.bz2 -o teamspeak.tar.bz2

    It is VERY important that you download the correct file for your operating system. So make sure you get it right 😛


    Next, we need to extract the file you downloaded like so.

    tar -xjf teamspeak.tar.bz2


    Now we need to set up the user that TeamSpeak will run as. I will use the user TeamSpeak in this tutorial.

    adduser --disabled-login teamspeak


    Now we want to move TeamSpeak to the user’s directory we just created. If you didn’t use TeamSpeak as the username just replace the part in bold with the username you used.

    mv teamspeak3-server_linux_* /home/teamspeak/teamspeak3


    Next up we need to make sure we change the permissions of the teamspeak3 folder to allow the user we created to access it. Again if you didn’t use the username TeamSpeak just replace the bit in bold.

    chown -R teamspeak /home/teamspeak/teamspeak3


    Now we need to add the TeamSpeak3 startup script to the init.d files.

    ln -s /home/teamspeak/teamspeak3/ts3server_startscript.sh /etc/init.d/teamspeak


    Now we need to tell the server to update the init.d scripts.

    update-rc.d teamspeak defaults


    Now you can use commands like.

    service teamspeak start
    service teamspeak stop
    service teamspeak restart


    Please note the first time you start the server it will spit out some information like this. PLEASE save it as you will need it!


    ------------------------------------------------------------------
                      I M P O R T A N T
    ------------------------------------------------------------------
    Server Query Admin Account created
    loginname= "serveradmin", password= "qp8UdSH7"
    ------------------------------------------------------------------
    
    
    ------------------------------------------------------------------
                      I M P O R T A N T
    ------------------------------------------------------------------
    ServerAdmin privilege key created, please use it to gain
    serveradmin rights for your virtualserver. please
    also check the doc/privilegekey_guide.txt for details.
    
    token=Ux881tdg7A9WQVleJeKLtg6Fi+oO5hgFpIxGQ3j8
    ------------------------------------------------------------------


    And now you are done. Every time you restart your server, TeamSpeak will automatically start with it.

    Good luck and happy TeamSpeaking! 😀